A couple of months ago I was issued a challenge at Salt Lake Modern Quilt Guild. We were given a vintage quilt block and the only rule was that we need to use the block in a new project. We can use the block as is or deconstruct it. Even though the block is super wonky, I want to use it as it is because I am partial to LeMoyne Star blocks.
I spent a few weeks thinking about how I wanted to incorporate Mr. LeMoyne, and then I started playing in Electric Quilt 8. Somehow I ended up hitting upon this design that uses New York Beauty blocks. One would think that I was confident about curves and foundation paper piecing, but no… I haven’t really done much paper piecing and absolutely no curves.

I printed this out of EQ8 and I have had it hanging up in my quilt room for over a month. I gathered the fabrics that I thought I wanted to use, based on the fabrics in Mr. LeMoyne. And then I did nothing. I was so intimidated that I just couldn’t get out of my own way to get started.
Finally last week I printed the patterns and got them photocopied. (For some reason I could only print one in EQ8. I must not understand how to use that option.) On Wednesday I finally mustered up the courage to begin.

Although I am truly not an expert at these techniques, I have learned some things that might help you if you decide to try New York Beauty blocks. You should search YouTube and watch several tutorials on paper piecing. I won’t go into the basics here- just my impressions of struggling and finding work arounds.
- I like to keep some extra paper around the cut lines of the pattern. It doesn’t have to be a lot- I typically had about 1/2 inch. It gives you some room to hold on to things and you end up with a nice clean line when you trim the block at the end.

2. I begin sewing at the cut line, down the printed line and to the next cut line. If you don’t do this you may end up with some holes in your blocks. When you flip the piece to trim it, you will have to gently tug the paper away from the 5-6 extra stitches but that is no big deal- you are done with that line anyway. BTW- make sure you set your stitches a bit smaller than usual. On my Brother Innovis I use the 2mm stitch length.
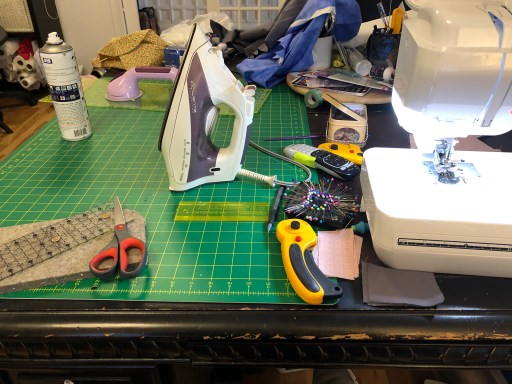
3. I think it is important to press EVERY. SINGLE. SEAM. I know. . . I know. This seems like overkill, but it makes your blocks come out so beautifully. This would be a big pain if you have to keep getting up and down. I rearranged my space to the left of my machine so that I could sew, press, and cut without having to move. That said. . . GET UP AND MOVE once in a while. Walk and stretch- it is important for your neck and arm muscles.


4. There is no secret to piecing the curves. The little ones are tight and a bit tough. I pin the center and both sides and then ease the fabric together. I made the mistake of trying to start the edge with the pin still in, but my machine was not happy about that, so when I put the fabric on my machine I take out that first pin. The others can be removed as you go. By the time I got to the 15th and 16th blocks, I did not pin the outermost band on the blocks- and they eased in beautifully. In fact, I think they look better than the ones I pinned.

Here’s what I know- these will not be my last New York Beauty blocks. It was fun to do the paper piecing and I am excited to finish the outside piece of the blocks- once I decide what color I want. I expect that this wall-hanging sized quilt top will be finished today or tomorrow. Stay tuned to see the top as soon as I am done!
What are your thoughts?